
Starting your vaping journey takes just three essentials: a beginner-friendly device (pod system or vape pen), the right e-liquid, and about five minutes to learn proper technique. Most newcomers are ready to take their first satisfying puff within an hour of unboxing, and the learning curve is gentler than you might expect.
The reality is that vaping in 2026 has become remarkably approachable. Gone are the days when you needed to understand ohm’s law or build your own coils just to get started. Today’s entry-level devices are designed with simplicity in mind, featuring pre-filled or refillable pods that snap into place, draw-activated firing (no buttons required), and built-in safety features that handle the technical complexity for you.
What separates a smooth first experience from a frustrating one comes down to matching your device type to your goals. If you’re transitioning from smoking, you’ll want higher nicotine strength and a tighter draw that mimics a cigarette. If you’re exploring vaping for flavor or social reasons, lower nicotine and a more open airflow might suit you better. These aren’t trivial details, they directly affect whether your first attempt feels natural or leaves you coughing.
This guide walks you through the practical mechanics: what each component does, how to fill and prime your device correctly, the technique for inhaling (mouth-to-lung versus direct-to-lung), and how to recognize when something’s working as it should. We’ll also cover the safety checks that matter and the common beginner mistakes that are easy to avoid once you know what to look for. By the end, you’ll have the confidence to choose your setup and start vaping safely.
What You’ll Need to Get Started
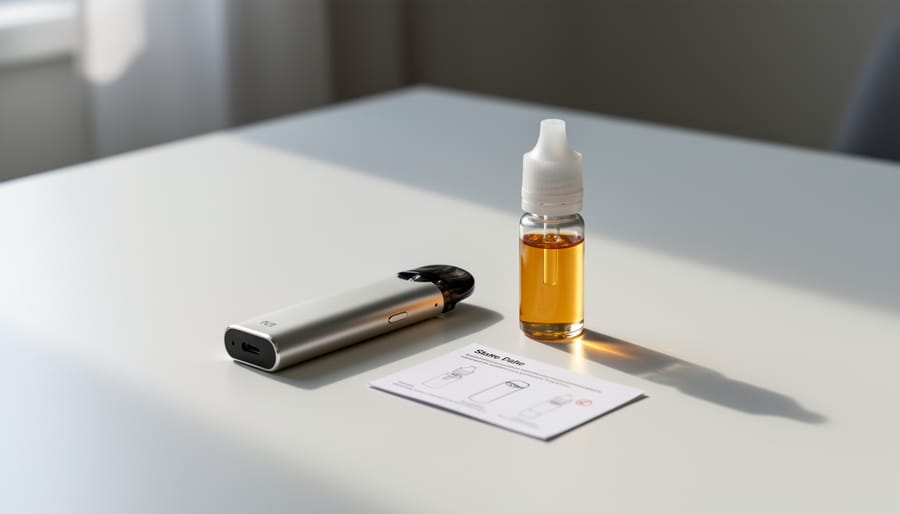
Starting your vaping journey doesn’t require a complicated shopping list. Most beginners can get everything they need with three core items: a device, e-liquid, and a way to charge it. Let’s break down what actually matters and what you can skip until later.
Your device is the foundation. For first-timers, a pod system or closed-pod starter kit hits the sweet spot between simplicity and performance. These compact devices handle everything automatically, no buttons to press, no settings to adjust, just inhale and go. Pod systems like the SMOK Nord series or Vaporesso XROS range typically cost between $20 and $40 and come ready to use out of the box. Avoid the temptation to jump straight into advanced box mods with screens and wattage controls; you’ll spend more time confused than vaping.
E-liquid is your second essential. If you’re transitioning from cigarettes, nicotine strength matters more than flavor at first. A pack-a-day smoker usually needs 12 to 20 mg/ml freebase nicotine or 20 to 35 mg/ml nicotine salts to feel satisfied. Light smokers or the curious can start at 3 to 6 mg/ml or even zero. Pick a flavor profile that sounds appealing, tobacco, menthol, fruit, dessert, but don’t overthink it. You’ll discover your preferences as you go, and most 10ml bottles cost under $10.
Charging equipment often comes included, but verify you have a USB cable compatible with your device. Many 2026 models use USB-C, which charges faster and fits both ways. Keep the original cable; cheap knockoffs can damage batteries or charge inconsistently.
Here’s your quick checklist:
- Pod system or starter kit (device with pre-installed or replaceable pods)
- E-liquid bottle in appropriate nicotine strength
- USB charging cable (usually included)
- Spare coil or replacement pod (optional but smart to have on hand)
- Protective carrying case (optional, prevents pocket lint and leaks)
- Paper towels or tissues for any minor spills during filling
Spare coils deserve a mention because they’re consumable parts. Each coil lasts one to three weeks depending on how often you vape and what e-liquid you use. Sweeter flavors burn through coils faster. Buying a pack of replacement coils upfront saves you from scrambling when your vapor tastes burnt, though most starter kits include at least one spare.
A carrying case isn’t critical, but if you plan to toss your vape in a bag or pocket with keys and coins, a $5 silicone sleeve or zipper pouch prevents scratches and accidental button presses. Think of it as optional insurance.
Prioritize the basics first. You can always expand your collection with different flavors, backup devices, or accessories once you know vaping works for you. Starting lean keeps costs low and decision fatigue minimal.
Safety and Health Considerations Before You Begin
Before you take your first puff, a few safety essentials will protect you and anyone around you. These aren’t scare tactics, just practical precautions that experienced vapers follow without thinking.
Start with nicotine strength. If you’re transitioning from smoking, match your intake to what you were consuming: a pack-a-day smoker typically needs 12-20 mg/ml freebase nicotine or 20-35 mg/ml nicotine salts to avoid cravings. Light smokers can begin at 6-12 mg/ml. If you’ve never smoked, don’t vape nicotine at all. It’s addictive, and there’s no benefit to starting. Non-smokers who vape nicotine-free e-liquids should still be aware that vaping isn’t risk-free, it’s harm reduction for smokers, not a hobby for everyone.
Battery safety matters more than most beginners realize. Only use the charger supplied with your device or a verified replacement from a reputable brand. Cheap, counterfeit chargers can overheat or fail, damaging your battery or worse. Never leave your vape charging overnight or unattended, and inspect batteries regularly for dents, tears in the wrap, or unusual heat. If you spot any damage, stop using the device immediately and dispose of the battery at a proper recycling facility.
Store your e-liquid safely. Bottles should be kept out of reach of children and pets, preferably in a locked drawer or cabinet. Even small amounts can be harmful if ingested. Childproof caps help, but they’re not foolproof.
Some people react to common e-liquid ingredients. Propylene glycol, vegetable glycerin, and certain flavorings can trigger allergic reactions or sensitivities. Symptoms might include throat irritation, skin rashes, or headaches. If you experience severe reactions, persistent dizziness, chest tightness, difficulty breathing, or hives, stop vaping immediately and consult a healthcare provider. Listen to your body, especially in the first few days.
Step-by-Step: Setting Up and Using Your First Vape
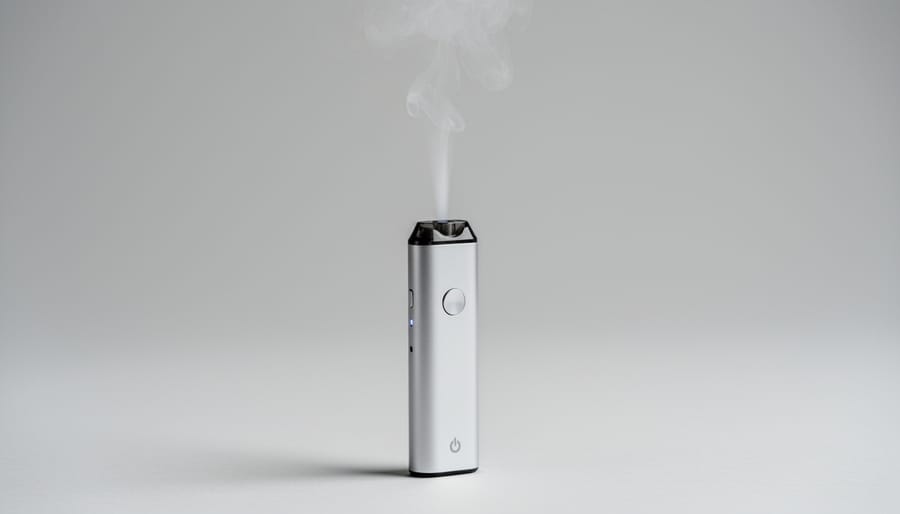
You’ve got your starter kit in hand, now what? Let’s break down exactly how to set up and use your device for the first time. These steps apply to most pod systems and vape pens, and understanding the “why” behind each action will help you avoid the rookie mistakes that lead to burnt hits or frustration.
- Unbox and inspect everything. Lay out all components: the device body, pod or tank, USB charging cable, user manual, and any spare parts. Check for obvious damage, cracks, dents, or loose connections. If anything looks off, contact the retailer before you power on. This isn’t just about defects; a quick visual scan helps you understand what you’re working with.
- Charge the battery fully. Plug the device into a wall adapter (5V/1A is standard) using the included cable. Most devices take one to two hours for a full charge. Don’t skip this step or rush it, starting with a partial charge can lead to inconsistent performance and may reduce long-term battery health. The LED indicator will usually change color or turn off when charging is complete.
- Prime the coil. If your device uses replaceable coils (check the manual), install the coil into the pod or tank, then add a few drops of e-liquid directly onto the exposed cotton wicking material. Let it sit for five minutes. This saturates the wick and prevents the dreaded dry hit, a harsh, burnt taste that happens when you fire a dry coil. Think of it as letting a sponge soak up water before you squeeze it. For built-in coils, skip the manual priming but still let the filled pod sit before vaping.
- Fill the pod or tank with e-liquid. Remove the pod from the device (or unscrew the tank), locate the fill port (often a silicone plug on the side or bottom), and slowly add your chosen e-liquid. Don’t overfill, leave a small air gap at the top. Wipe away any spills to avoid sticky residue. Replace the plug or cap firmly to prevent leaks. A coil quality check at this stage can save you headaches later; if the coil looks misaligned or damaged, swap it out now.
- Assemble and power on. Insert the filled pod into the device until it clicks into place. If your device has a fire button, press it five times rapidly to turn it on (five clicks also turns it off). Draw-activated devices power on automatically when you inhale, no button needed. Check the LED: a solid light usually means it’s ready, a blinking light often signals low battery or a connection issue.
- Adjust airflow if available. Some devices have a rotating ring or sliding switch at the base to control airflow. For your first puff, set it to a tighter draw (less airflow), this mimics the resistance of a cigarette and works well for mouth-to-lung (MTL) vaping, where you draw vapor into your mouth first, then inhale. You can experiment with wider airflow later.
- Take your first puff. Place the mouthpiece gently between your lips. If it’s button-activated, press and hold the fire button while you draw; if it’s draw-activated, just inhale steadily. Start with a slow, three-second pull, don’t yank on it like a straw. Hold the vapor in your mouth briefly, then inhale it into your lungs or exhale directly (your choice). Release the button before you stop inhaling to avoid excess vapor.
- Recognize when to replace or refill. You’ll know the pod is empty when flavor drops off or you see the liquid level at or below the minimum fill line. A burnt or muted taste signals a spent coil, replace it rather than pushing through. Most coils last one to three weeks depending on usage and e-liquid sweetness.
That’s it. You’ve just completed your first vaping session. If you experienced smooth vapor and a satisfying throat hit, you’re on the right track. If something felt off, harsh taste, no vapor, gurgling, revisit the priming and assembly steps or check the troubleshooting section in your manual. The learning curve is short, and within a day or two, these steps will become second nature.
How to Know You’re Doing It Right
You’ll know your vaping setup is working correctly when you get smooth, flavorful vapor with each puff, no harsh burnt taste, no leaking from the tank or pod, and a throat hit that feels right for your nicotine preference. Check your device’s LED indicator: a steady light during use and a full charge symbol when powered up are good signs. If you’re getting consistent flavor and vapor production without coughing fits or chemical aftertaste, you’re on the right track.
Watch out for burnt or metallic flavors, that’s your biggest red flag. It usually means the coil is dry or burnt out, often from vaping before the wick fully saturated with e-liquid or pushing the device beyond its limits. Let a new coil sit for five minutes after filling, and take a few gentle puffs without firing to help the liquid soak in.
Chain vaping is the most common beginner mistake. Taking puff after puff without breaks doesn’t give the wick time to re-saturate, leading to dry hits and burnt coils. Space your puffs by at least 15-20 seconds, especially with higher-wattage devices. If you’re constantly craving another hit, your nicotine strength might be too low, consider moving up a level rather than vaping more frequently.
Incorrect nicotine strength shows up as either too harsh (coughing, dizziness, headaches) or unsatisfying (constant cravings, vaping non-stop). Former pack-a-day smokers typically need 12-20 mg/ml freebase or 20-35 mg/ml nicotine salts. Light smokers or curious non-smokers should start at 3-6 mg/ml or zero. Adjust based on how you feel, not what sounds impressive.
Over-tightening airflow is another trap. Restricted airflow can improve pod cartridge performance for mouth-to-lung vaping, but closing it completely strains the coil and mutes flavor. Start with airflow halfway open and adjust from there.
Battery life varies by device and usage, but most beginner setups need charging daily. If your LED blinks red or the vapor weakens noticeably, charge before the battery dies completely, this extends overall battery lifespan.
Once you’ve got the basics down, experiment. Try different flavor profiles to find what you enjoy, adjust wattage if your device allows (start low and increase gradually), and explore online communities like Reddit’s vaping forums for real-world advice. When your current device feels limiting or you want more control, that’s when to consider upgrading, not before you’ve mastered the fundamentals.
Choosing the Right Device Type for Your Needs
Your first device shapes your entire vaping experience, so let’s cut through the jargon and look at what actually works for beginners in 2026.
Disposable vapes are the simplest entry point: pre-filled, pre-charged, and ready to use straight from the package. You vape until they’re empty, then recycle them. They cost between $8 and $15 each, last anywhere from 600 to 3,000 puffs depending on the model, and require zero maintenance. The downside is ongoing cost. If you vape daily, disposables can run you $50 to $100 monthly, and you have no control over nicotine strength or flavor beyond what the manufacturer offers.
Pod systems hit the sweet spot for most first-timers. These compact devices use replaceable or refillable pods, giving you flexibility without complexity. Choosing a pod system means balancing convenience and customization. Closed-pod systems (pre-filled pods you swap out) cost $15 to $30 for the device, with pods around $4 to $6 each. Open-pod systems (you refill them yourself) have similar device prices but let you buy bottled e-liquid, which drops your per-ml cost significantly. Both types fit in your pocket, charge via USB-C in under an hour, and deliver consistent flavor. When evaluating hardware like the Gcell vs CCELL debate, you’ll see how cartridge technology affects vapor quality and reliability, even in beginner devices.
Vape pens are cylindrical, pen-shaped devices with a built-in battery and a refillable tank. They’re affordable ($20 to $40) and great for mouth-to-lung vaping, which mimics the draw of a cigarette. The trade-off is size: they’re bulkier than pods and require you to understand coil replacement and tank filling from day one.
Box mods are advanced, variable-wattage devices with external batteries and large tanks. They offer total control over your vaping experience but demand technical knowledge about ohms, wattage curves, and battery safety. Skip these until you’ve got months of experience.
For your first device, go with a closed or open pod system. They’re forgiving, portable, and let you focus on finding your preferred nicotine strength and flavors without getting lost in settings.
Understanding E-Liquids: Nicotine, PG/VG, and Flavors
E-liquid is where your vaping experience really takes shape, and understanding what’s inside that bottle helps you pick the right formula for your needs. Every e-liquid contains a base (propylene glycol and vegetable glycerin), flavorings, and optional nicotine. The ratio of these ingredients determines how your vape feels and tastes.
Nicotine comes in two main forms. Freebase nicotine, the traditional type used in cigarettes, delivers a stronger throat hit and works best at lower concentrations (3-12 mg/ml). Nicotine salts, a newer formulation, absorb faster and feel smoother at higher strengths (20-50 mg/ml), making them ideal for pod systems and the best pod option devices. If you smoked a pack a day, start with 12-20 mg/ml freebase or 20-35 mg/ml salts. Light smokers can drop to 6-12 mg/ml freebase or 10-20 mg/ml salts. Non-smokers should stick to zero-nicotine e-liquids to avoid unnecessary addiction.
PG/VG ratios shape the physical experience. Propylene glycol (PG) is thin, carries flavor well, and produces a pronounced throat hit. Vegetable glycerin (VG) is thicker, creates bigger clouds, and feels smoother. A 50/50 PG/VG blend suits most beginners, balancing throat sensation with visible vapor. High-VG liquids (70/30 or 80/20) work better in advanced devices with larger coils, while high-PG blends fit tighter, mouth-to-lung setups.
Flavor selection is personal, but start with profiles you already enjoy: fruit, dessert, menthol, tobacco. Quality matters more than variety at first. Avoid overly complex mixes until your palate adjusts.
Regulations vary globally. The EU’s Tobacco Products Directive caps nicotine at 20 mg/ml and bottle sizes at 10 ml. Some regions restrict certain flavors or impose age verification requirements. Check local rules before purchasing, and always buy from reputable vendors who label ingredients clearly and test for contaminants.
Common Questions New Vapers Ask
Starting something new always brings a flood of questions, and vaping is no exception. Here are the answers to the concerns most first-timers have, no judgment, just straight talk.
How much does it cost to start vaping?
A decent starter kit (pod system or vape pen) runs between $20 and $40, with e-liquid adding another $10-15 per 30ml bottle that typically lasts one to two weeks for moderate users. Budget around $30-50 for your first month, then $20-30 monthly for e-liquid and occasional coil replacements.
How long does a coil last?
Most coils last one to three weeks depending on your vaping frequency, e-liquid sweetness (sugary flavors gunk up coils faster), and wattage. You’ll know it’s time to swap when you get a burnt taste or noticeably weaker flavor.
Is vaping really less harmful than smoking?
Multiple public health agencies, including Public Health England, have concluded that vaping is significantly less harmful than smoking combustible tobacco, though not entirely risk-free. It eliminates tar and most carcinogens found in cigarette smoke, but long-term effects are still being studied.
What if I cough at first?
Coughing during your first few sessions is common, especially if you’re using too high a nicotine strength or pulling too hard. Try lower nicotine, gentler draws, or a higher-VG e-liquid (smoother on the throat), and give your body a week to adjust.
Can I vape indoors? Legally, it varies by country and venue, some places treat vaping like smoking, others don’t. Practically, even where it’s allowed, be considerate: ask housemates, avoid blowing clouds in people’s faces, and respect no-vaping signs. Vapor dissipates faster than smoke and doesn’t cling to fabrics the same way, but etiquette matters.
How do I know when to replace my device? Most starter devices last six months to two years with proper care. Replace yours if the battery won’t hold a charge, the device leaks constantly despite new coils, or components crack or malfunction. If you’re just bored and want better flavor or features, that’s a fine reason to upgrade too.
One more thing people wonder: what if I don’t like the flavor I bought? It happens. Try a different profile, if sweet fruit isn’t working, go for menthol or tobacco. Many vape shops let you sample flavors, and online communities often trade or sell unopened bottles. Don’t force yourself to finish something you hate; vaping should be enjoyable, not a chore.
You’ve got the essentials now: pick a simple pod system or starter kit, choose an e-liquid with the right nicotine strength for your situation, charge the device, prime the coil, and take that first puff with confidence. Starting to vape isn’t complicated once you understand the basics, safety first, then equipment, then technique. The learning curve is short, and most beginners find their rhythm within a few days.
Remember, this guide covers the fundamentals, but your experience will be uniquely yours. You’ll discover which flavors you love, whether you prefer a tighter or looser draw, and how often you need to vape to satisfy your cravings. Don’t be discouraged if your first device isn’t perfect or if you cough a bit at the start, that’s normal. Adjust, experiment, and give yourself permission to learn.
Beyond this walkthrough, our site offers detailed device reviews to help you upgrade when you’re ready, community forums where you can ask questions and share experiences with vapers worldwide, and in-depth analysis of industry trends shaping the vaping landscape in 2026. Whether you’re transitioning from smoking or exploring vaping for the first time, you’re part of a global community that values harm reduction, innovation, and informed choice.
Take your time, stay curious, and vape responsibly. Your journey starts here, but where it goes is entirely up to you.